AngularJS ng-view: Angular JS View is the place where the content is displayed for the user. Based on the user request, the ng-view in Angular JS will display the content to the user. Even though it is a SPA(Single Page Application), it provides a number of views. With the help of views and routes, an application can divide into logical views and combine different views to controllers.
AngularJS ng-view Example
Routing helps to load different views for an application, which makes our application more manageable. For example, Consider we have an application for registration to add students and view students for admission.
To develop a registration application as mention in the above example we can create two separate views on the same page rather than two separate web pages. Hence, the application contains two reference links i.e., show and new. If the user goes to application MyApp#show it helps to view students without leaving an existing page. Similarly, if the user goes to MyApp#new it helps to add a student to the existing page.
We have to create multiple controllers for multiple views. Hence, each and every view has its own controller that controls the logic of its functionality.
AngularJS ng-view
The ng-view directive works like a placeholder that the regarding view can be placed based on the configuration. Hence, a view can be HTML or ng-template view.
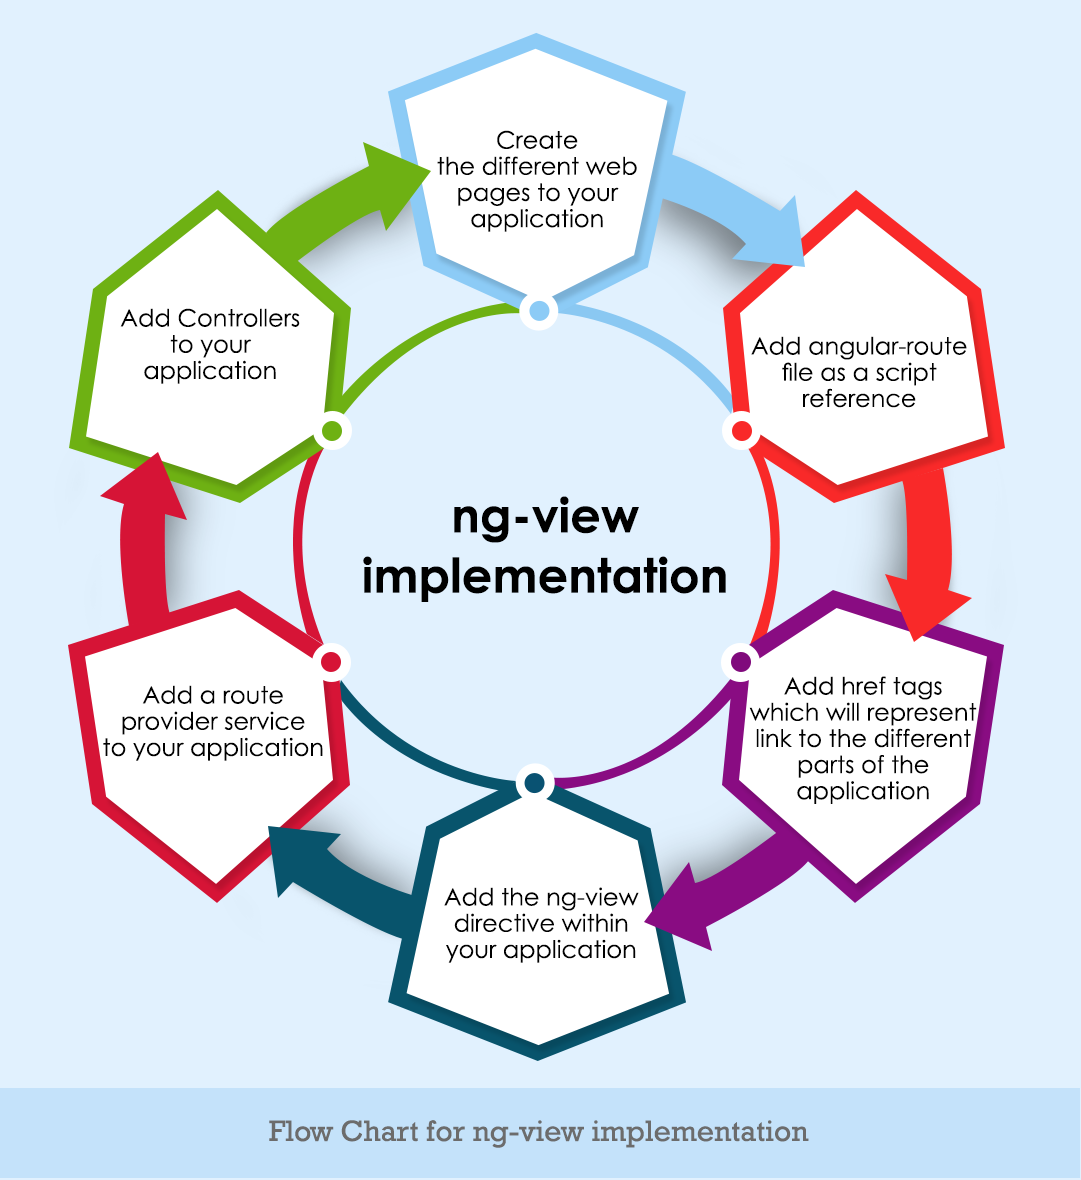
Flow Chart for AngularJS ng-view Implementation
AngularJS ng-view Implementation Steps
To implement ng-view follow the below steps.
Step 1: Include the angular route file as a script reference.
<script src="lib/angular-route.js"></scrpit>
This route file is used to make the use of functionalities of multiple routes and views. It can also be downloaded from the official Angular JS website.
Step 2: Now, add href tag for the links which represent “adding new student” and “Displaying student”.
The div tag in the ng-view directive is used to view the page and also allows users to click on “Add new student” or “displaying student”.
<div class="container">
<ul><li><a href="#!NewEvent"> Add New Student</a></li>
<li><a href="#!DisplayEvent"> Display Student</a></li></ul>
<div ng-view></div></div>
Step 3: The following code should be added to the script tag.
When the user clicks on the “Add new student” in the div tag that directs to the add_student.html that takes the code and adds to the view. To add business logic to that view go to “add student controller”.
Display Student View Example
The below code was provided in the default view shown which is the DisplayStudent view to the user.
var app = angular.module('sampleApp',["ngRoute"]);
app.config(function($routeProvider){
$routeProvider.
when("/NewStudent",{
templateUrl : "add_student.html",
controller: "AddStudentController"
}).
when("/DisplayStudent", {
templateUrl: "show_student.html",
controller: "ViewStudentController"
}).
otherwise ({
redirectTo: '/DisplayStudent'
});
Step 4: Here we have to add controllers for both the “displyStudent” and Add new student”. To add controllers for both views use the following code.
Add New Student Example
app.controller("AddStudentController", function($scope) {
$scope.message = "This is to Add a new Student";
});
app.controller("ViewStudentController",function($scope){
$scope.message = "This is display an Student";
});
Step 5: Now create pages add_student.html and show_student.html.
In our program, the add_student.html has a header tag with the text “Add New Student” which displays a message as “This is to Add a New Student”. Similarly, the show_student.html also contains a header tag with the text “Display Student” with a message “this is to display students”.
The message variable value will be injected into the controller based on the particular view. For every page, we have to add a message variable for the corresponding controller.
add_student.html
<h2>Add New Student</h2>
{{message}}

show_student.html

<h2>Display Student</h2>
{{message}}
AngularJS ng-view Example
<!DOCTYPE html>
<html>
<head>
<meta chrset="UTF 8">
<title> Registration</title>
<script src="https://code.angularjs.org/1.5.9/angular-route.js"></script>
<script src="https://code.angularjs.org/1.5.9/angular.min.js"></script>
<script src="lib/bootstrap.js"></script>
</head>
<body ng-app="sampleApp">
<div class="container">
<ul><li><a href="#!NewStudent"> Add New Student</a></li>
<li><a href="#!DisplayStudent"> Display Student</a></li>
</ul>
<div ng-view></div>
</div>
<script>
var app = angular.module('sampleApp',["ngRoute"]);
app.config(function($routeProvider){
$routeProvider.
when("/NewStudent",{
templateUrl : "add_student.html",
controller: "AddStudentController"
}).
when("/DisplayStudent", {
templateUrl: "show_student.html",
controller: "ViewStudentController"
}).
otherwise ({
redirectTo: '/DisplayStudent'
});
});
app.controller("AddStudentController", function($scope) {
$scope.message = "This is to Add a new Student";
});
app.controller("ViewStudentController",function($scope){
$scope.message = "This is to display Student";
});
</script>
</body>
</html>
Angular JS ng-view Example Output
Add New Student
Display Student
This is to add the new student
If we want to display the display Student view the output will be:
Add New Student
Display Student
This is to display the student
Conclusion
Hence, we have provided all the information about the ng-view of angular js with syntax and examples. Hope all questions are answered.


