HTML5 Image Tag with Example: Images not only contribute to the overall feel and look of the website, but can also be used to direct site navigation or deliver important information. The use of images requires careful consideration and selection; otherwise, they lose effectiveness.
Images can be anything from a logo to a clickable navigation aid. They may make your site beautiful or contain important information. There are many websites that make perfect use of images to deliver their messages. In fact, well-used images are one of the most important components of any web design.
Image Types in HTML5
Before we discuss how to add an image to a web page, it is imperative to mention the type of images you can use in HTML 5. You can use many types of images, but we recommend using the following in your web pages.
- Joint Photographic Experts Group (JPEG)
- Graphics Interchange Format (GIF)
- Portable Network Graphics (PNG)
You also need to maintain a balance between image size and type in order for your website to load and render properly.
Adding images to HTML5
When you have your image ready, use image <img>, an empty element, to determine where your images will go on the website. Also, remember that <img> is a self-closing element and does not require separate opening and closing tags.
The following markup shows how you can add an image that resides in the same directory as that of the HTML 5 file to a web page.
Adding images to HTML5 Example
<!DOCTYPE HTML>
<html>
<head>
<meta charset="utf-8">
<title> Adding Images</title>
</head>
<body>
<h1>How to add images to a webpage</h1>
<p> The earth is round as the following images shows <br>
<img src="roundworld.jpg" alt="The Earth is Round" />
</body>
</html>
In this example, the source (src) attribute specifies the location of the image to be displayed on the web page. Similarly, the alt attribute offers alternate information for the image if the user cannot somehow view it. It is good practice to add alt text because it is helpful for visitors who are visually impaired, have slow internet connections, or are accessing the website from a browser with limited visual capabilities. Some search engines also index images with the help of alt text.
The browser will display the above HTML5 markup as follows:
Just like links, sometimes web developers store images in different directories. In this case, you have to mention the proper path of the image for the browser to display the image correctly. The following examples demonstrate how you can do so.
HTML5 Image Tag with Path Example
<!DOCTYPE HTML>
<html>
<head>
<meta charset="utf-8">
<title> Adding Images</title>
</head>
<body>
<h1>How to add images to a webpage</h1>
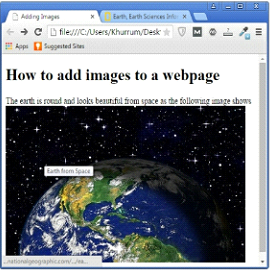
<p>The earth is round and looks beautiful from the space as the following image shows <br>
<img src="images/earth.jpg" alt="The Earth is Round" title="Earth from Space"/>
</body>
</html>
In this example, the src attribute is instructing the browser to:
- Find the folder named “images”
- Find the “earth.jpeg” image in the images folder.
In this case, the browser will display the following image:
HTML5 Image Tag with Path Example Output
The Titled Image
In addition to alt text, you should always use give images a title. A title is a text in which all search engines, including Chrome and Firefox, display when you hover the mouse over the image. You can add a title through a title attribute in <img> tag, just like src and alt. In the following example, we will add a title to an image.
The Titled Image Example
<!DOCTYPE HTML>
<html>
<head>
<meta charset="utf-8">
<title>Adding Images</title>
</head>
<body>
<h1>How to add images to a web page</h1>
<p> The earth is round as the following image
shows <br>
<img src="roundworld.jpg" alt="The Earth is Round"/>
</body>
</html>
The Titled Image Example Output
Making Images Clickable
It is possible to make an image a link. This is an easy task as you will be using the same <a> element to add links to images. However, in this case, you will replace the text between <a></a> with an image. Take a look at the following example:
Images Clickable Example
<!DOCTYPE HTML>
<html>
<head>
<meta charset="utf-8">
<title> Adding Images</title>
</head>
<body>
<h1>How to add images to a webpage</h1>
<p> The earth is round and looks beautiful from space as the following image shows <br>
<a href="http://science.nationalgeographic.com/science/earth/" target="_blank"><img
src="images/earth.jpg" alt="The Earth is Round" title="Earth from Space"/></a>
</body>
</html>
This markup has made our image a link which, once clicked, will open a particular page of the National Geographic website in a new tab.
Images Clickable Example Output
Resizing Images
Finally, you can change the width and height of images in HTML 5 by using the height and width attributes in <img> self-closing tags. The image in the above example has the width and height of 500 pixels and 300 pixels (500X300), respectively. We will change the dimensions to 600X400 pixels using our HTML 5 markup.
Resizing Images Example
<!DOCTYPE HTML>
<html>
<head>
<meta charset="utf-8">
<title> Adding Images</title>
</head>
<body>
<h1>How to add images to a webpage</h1>
<p> The earth is round and looks beautiful from space as the following image shows <br>
<img src="images/earth.jpg" alt="The Earth is Round" title="Earth from Space" width="600" height="400"/>
</body>
</html>
Resizing Images Example Output
As you can see, we have revised our image using width and height attributes; you can do the same with all the images you upload to your web page.
Exercise
Task:
Add an image that resides in a different directory from that of your HTML 5 file. Adjust the width and height to 400pixels each. Also include some alt text and a title for the image.
Solution:
<!DOCTYPE HTML>
<html>
<head>
<meta charset= "utf-8">
<title> Exercise</title>
</head>
<body>
<h1>Exercise 7</hl>
<img src="exercise/statue.jpg" alt="This is Statue of Liberty" title="Statue of Liberty" width="400"height="400"/>
</body>
</html>


